Popcosmo

DIY

TAILGATE TEE DIY

College, DIY, FASHIONChloe GordonComment

It’s football season and you know what that means... TAILGATE SEASON!

I’m going to be so real with you, I’m not a big football person. I would apologize, but I’m really not sorry for not enjoying watching a sport that has more downtime than actual playtime. I’m not trynna knock the sport that keeps America united, but like, I think I’m more of a soccer fan than a football fan. It’s a personal preference, ok?

But just because I’m not a huge football fan doesn’t mean I don’t love a good tailgate. Soaking up the fall sunshine, enjoying good company, and forgetting about all homework and responsibilities? Um yes, count me in. 

My friends and I hit up the school bookstore this past week for some new spirit wear and decided to DIY some tees. I came home to one of my friends crafting it up in our front yard and I couldn’t help but snap some pictures so I could share her masterpiece with you all. It turned out so well and she got so many compliments throughout the day! Not to mention it was super simple to execute. Totally worth a try if you're a tailgate-er. 

DIRECTIONS:
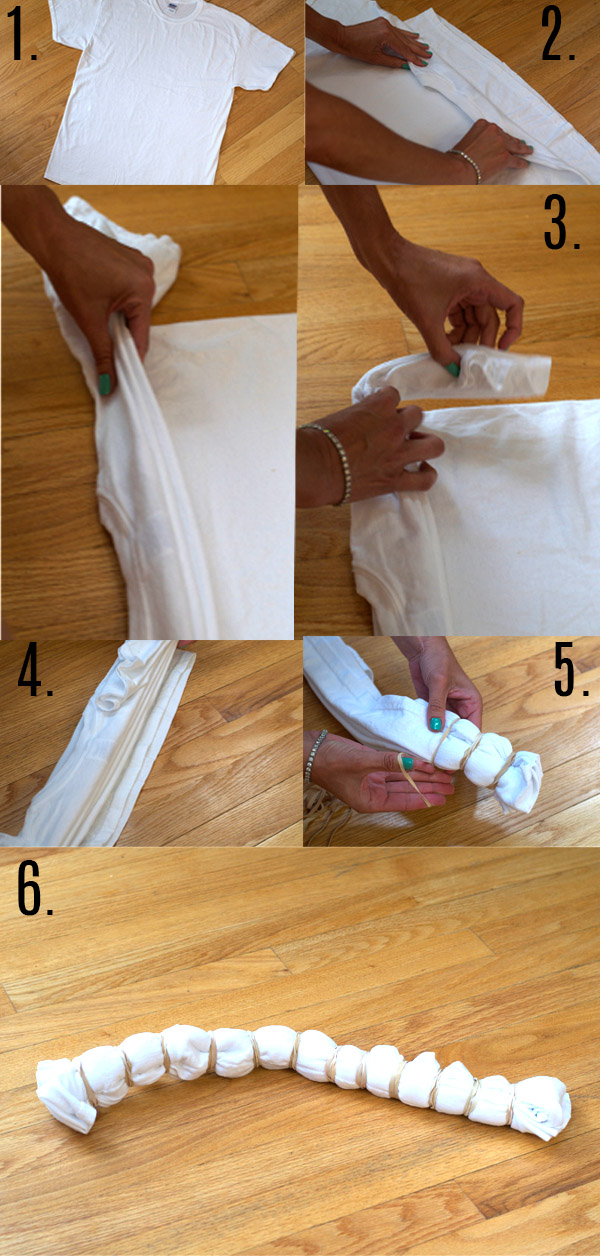
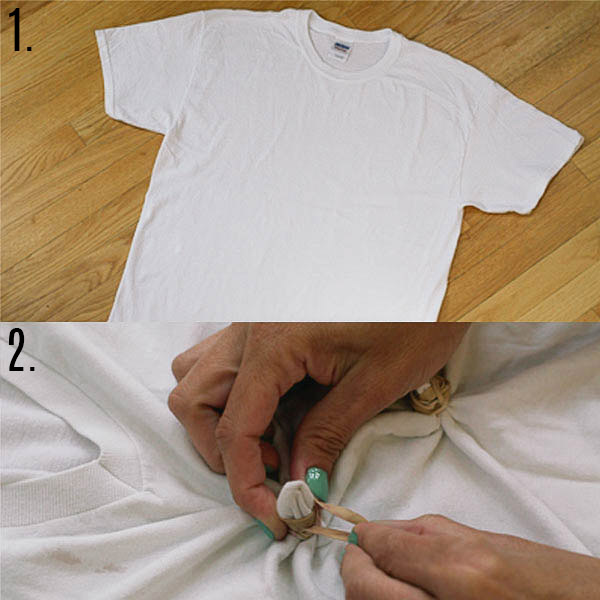
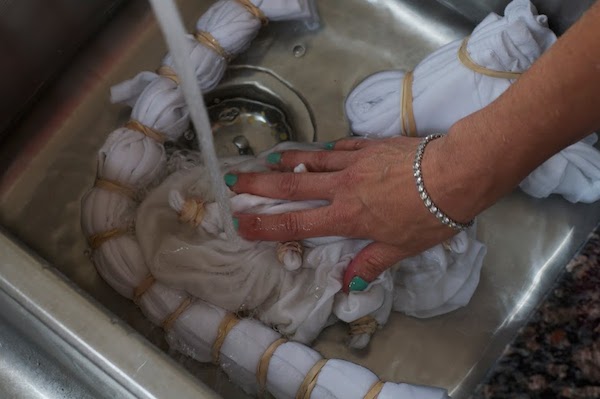
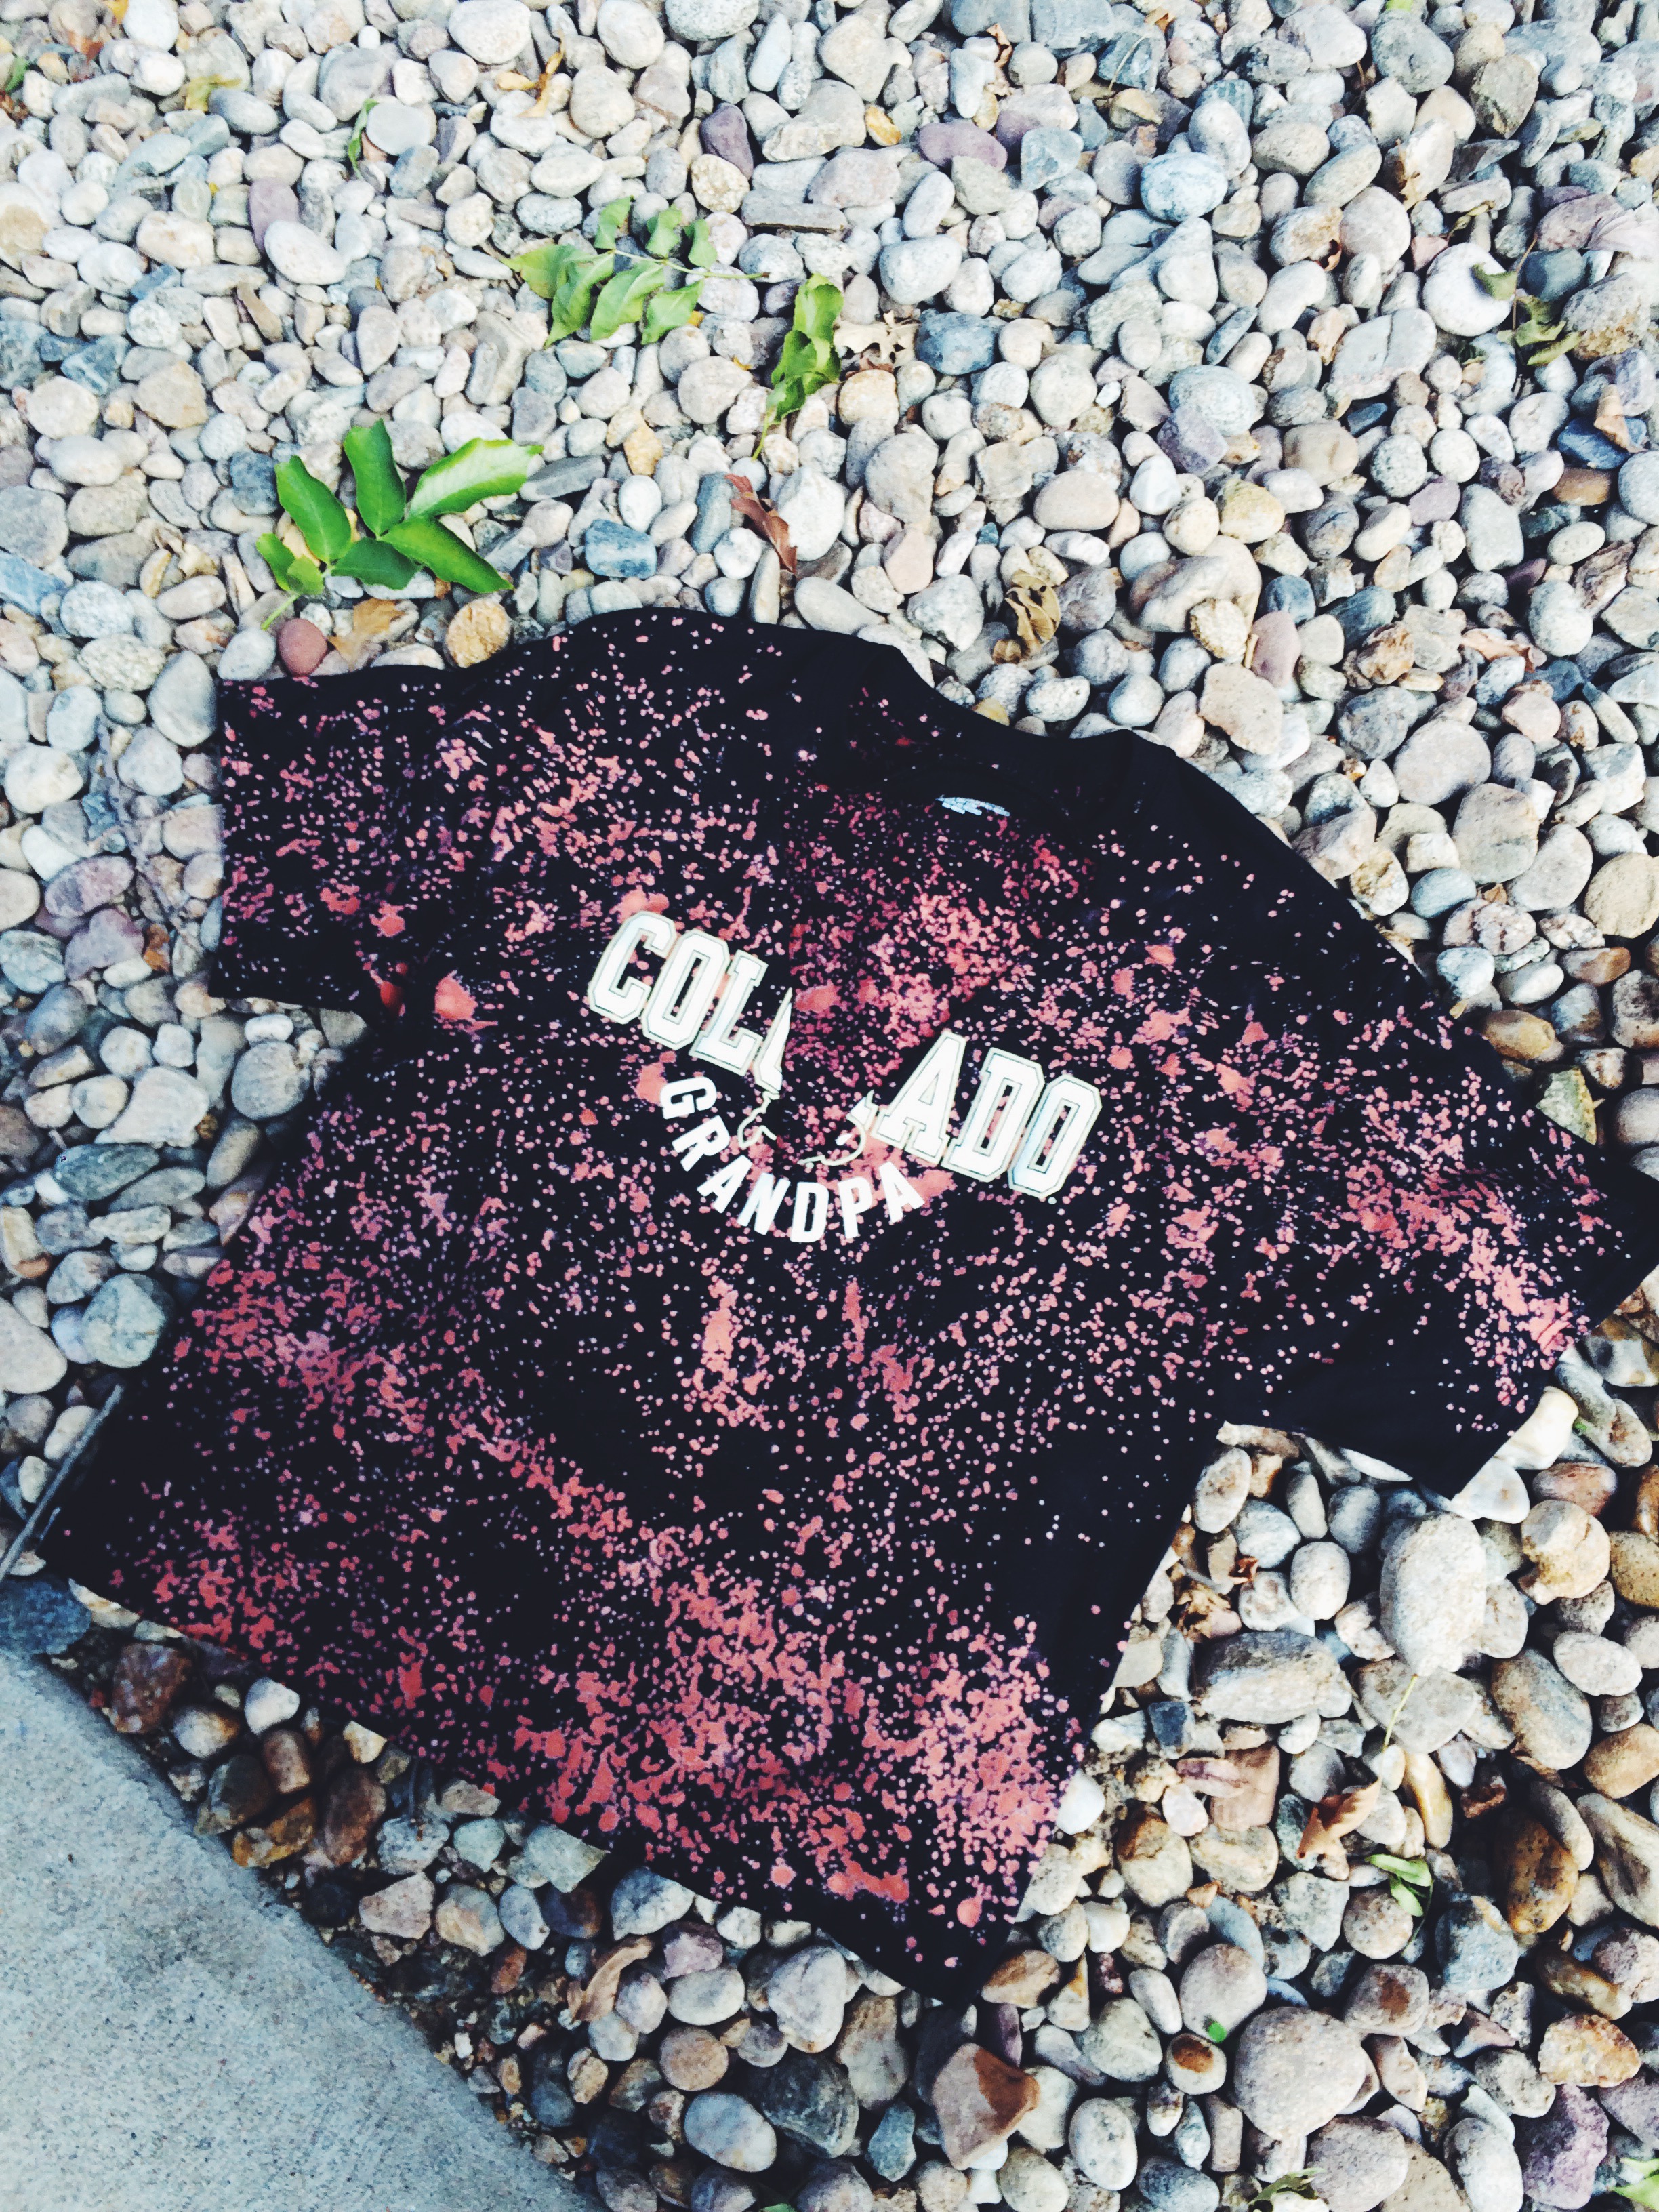
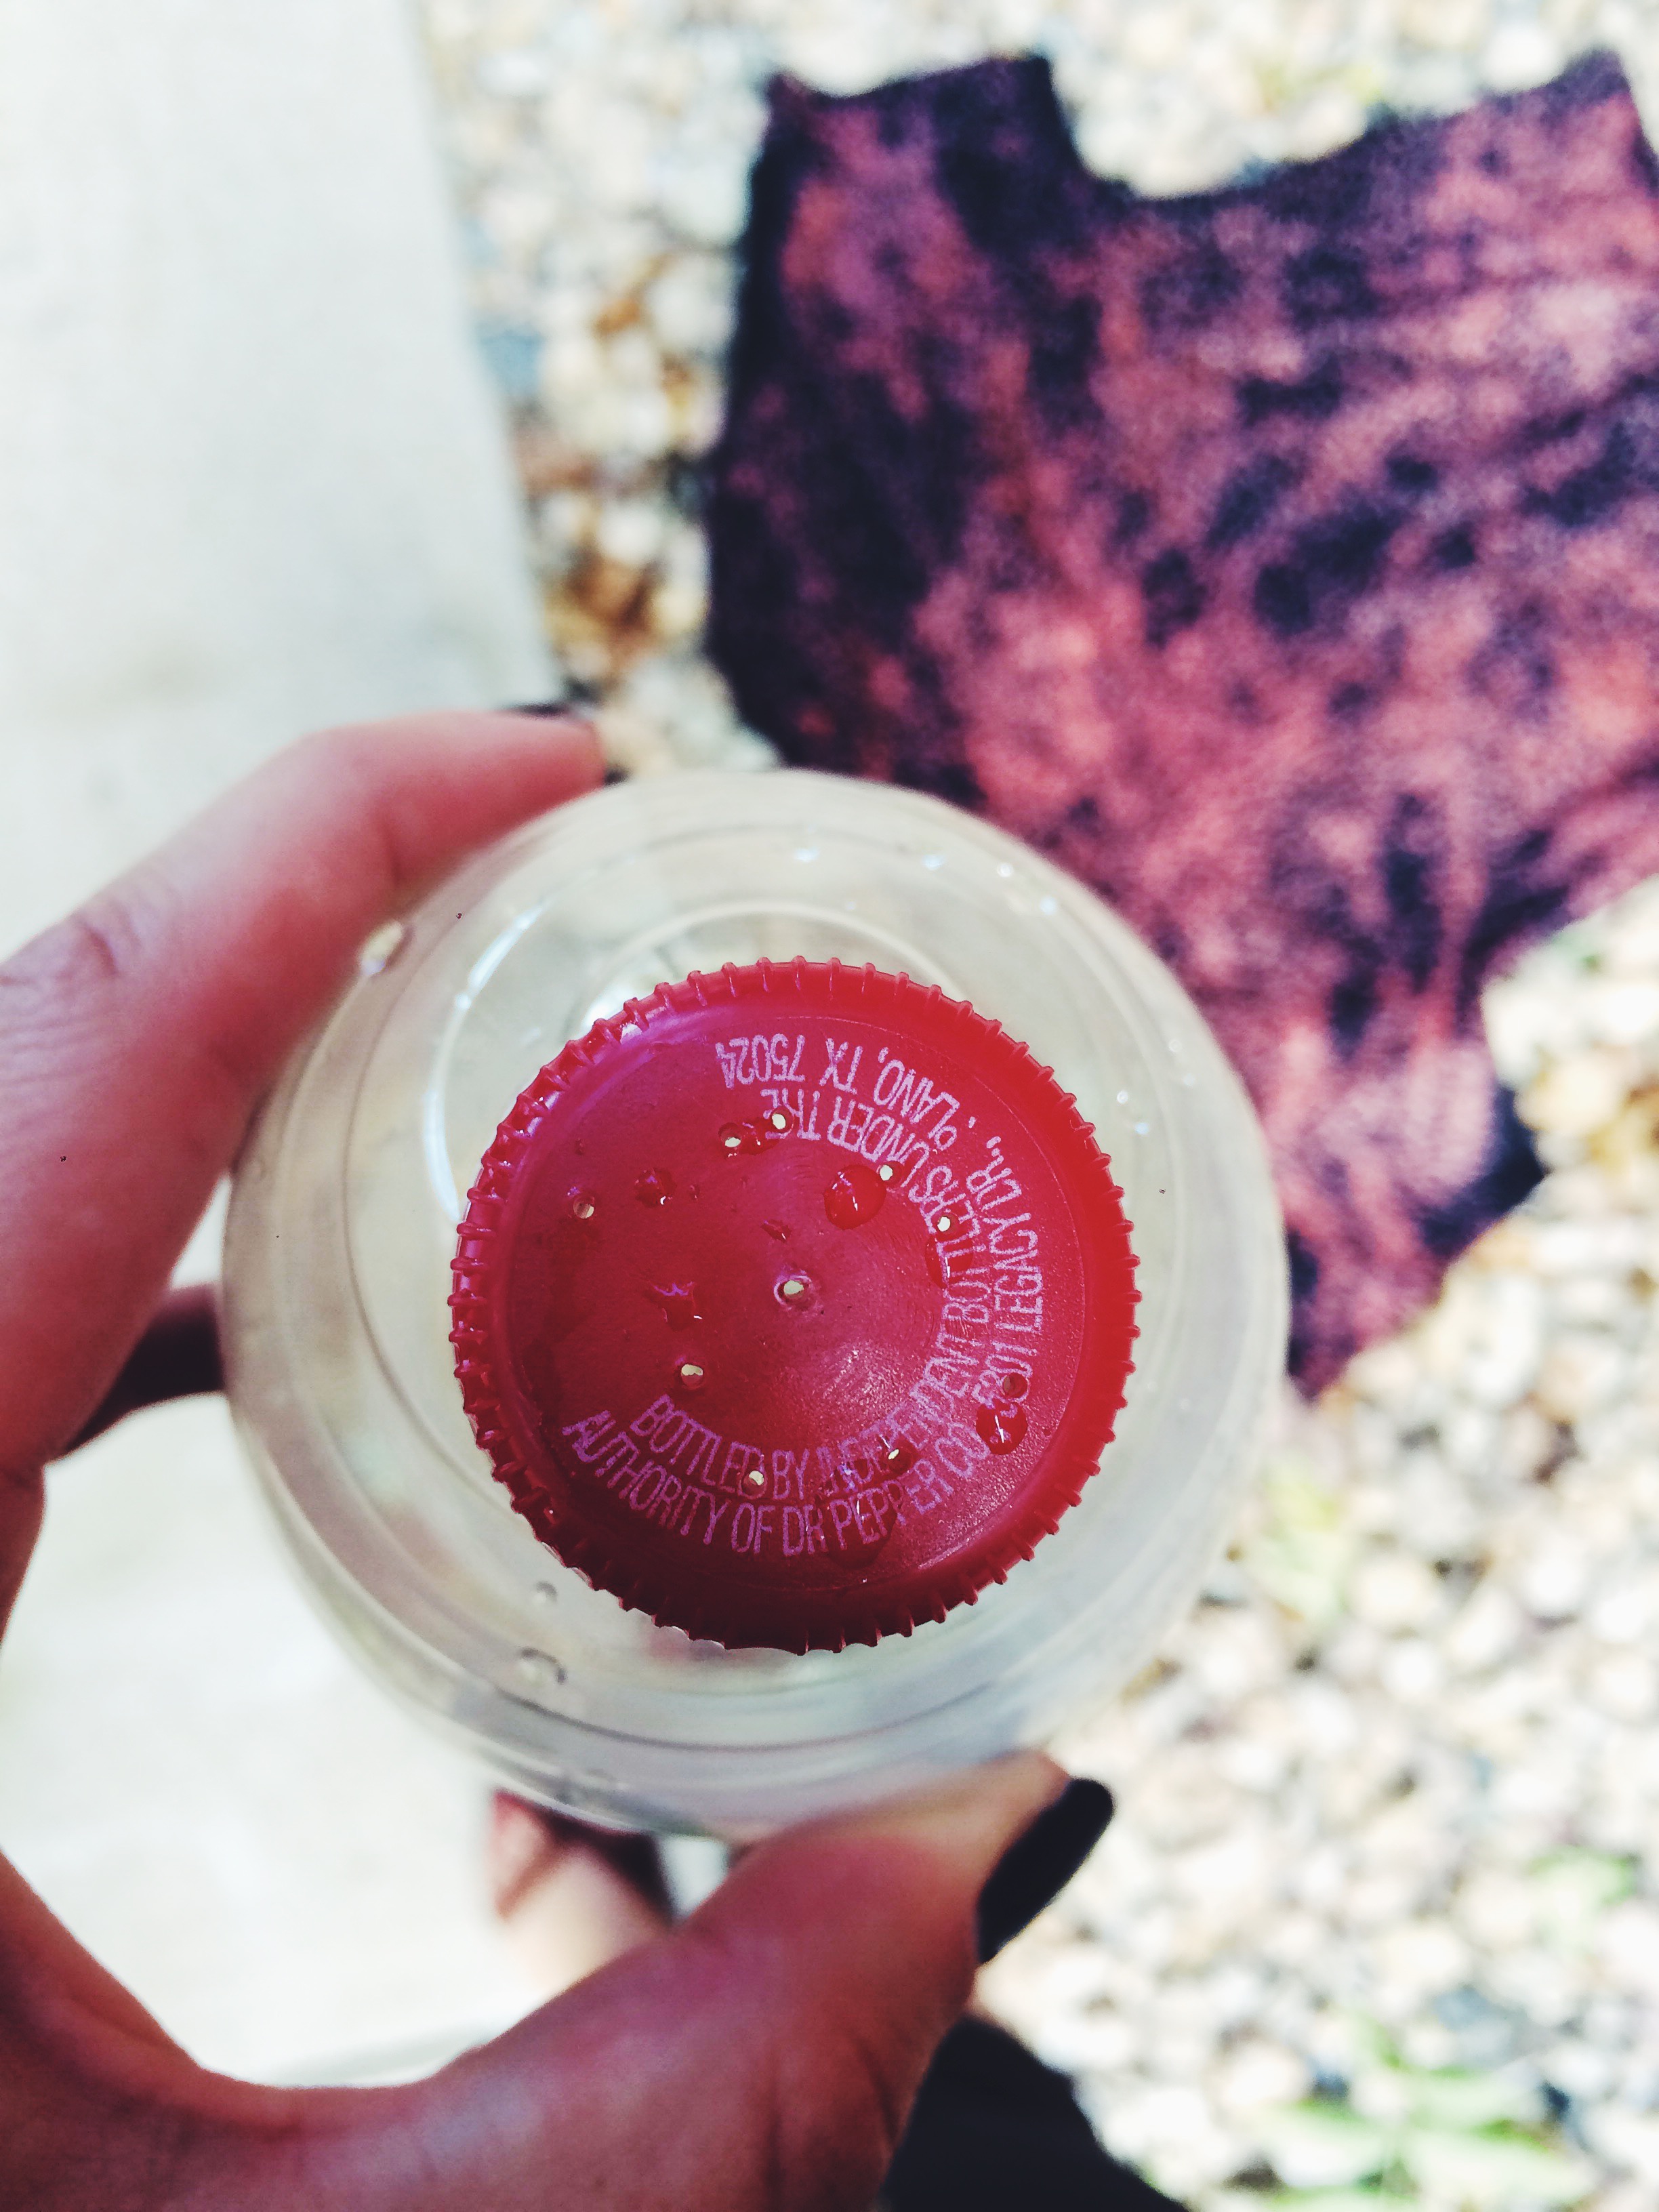
Basically she bought an XXL shirt, cut the bottom off to make it a “normal” length, used a bottle to sprinkle some bleach on the shirt, and cut a triangle out of the top to make the collar of the shirt look like a choker. SO EASY (even I could do it). 

Here are some pictures to better help explain, but if you have any questions feel free to leave them in the comments! 

Thanks for reading! 
xox
chloe

Energy Bites

DIY, EXTRAS, RECIPESKim & Chloe2 Comments

So, before I get into the real post, I just want to mention that a ton of people found out about my blog at school. It seemed like all of a sudden people were mentioning that they liked my blog or had seen my blog, and it was kind of weird at first. It’s not that I didn’t want people at school to know that I have an “internet life,” it’s just that it felt kind of separate. I’m not any different on my blog than I am in real life, but I do think of my blogging self as a whole different part of me. Anyway, I guess what I’m trying to say is that if you have a hobby or extracurricular activity that you’re passionate about, don’t worry if people find out about it. It’s who you are and it’s a part of you, regardless of what other people think about it. And, if you happen to be from school and you’re reading this… lemme know (;Ok, sorry, moving on to the real post now...

One of my friends from school brought some peanut butter balls to swim practice and she let me have one. Not only was it absolutely amazingly tasty, but it was the perfect snack to have right before a workout. She told me that she found the recipe on Pinterest so I did some digging and found it myself. I didn’t have all of the ingredients on hand so I kind of changed it around a little bit and I happened to really like the way they turned out! Here’s what I did, but if you want the real recipe to make these energy bites, click here.

Ingredients:

1 cup of dry oatmeal (old-fashioned oats) 3/4 peanut butter (I tried almond butter, but it wasn’t sticky enough) 1/2 cup chocolate chips 1/3 cup honey 2 table spoons chia seeds 1 teaspoon vanilla extract

Directions:

1. Pour everything in a bowl and mix it together. I found that using my hands to mix was much easer than using a spoon or whisk. 2. Put the mixed bowl into the fridge for at least half an hour 3. Roll into balls about 1” in diameter (or however big/small you want them)

Seriously, that’s it. These energy bites are so simple to make and so easy too! If you make them be sure to post a picture on Instagram or Twitter and tag us so I can see!

xox, Chloe

Check it out for free: "DIY Lifestyle Magazine"

DIYKim & Chloe18 Comments

A huge thanks to DIY Lifestyle Magazine for featuring us in their September issue! Check them out on your iPad - they were kind enough to provide a free month to all our readers (yay!) - because who doesn't want to sit back and gather some DIY inspiration? Besides our articles, you'll find some fun ideas and might even know some other bloggers featured. For your free trial, download the magazine here: http://bit.ly/T2rMXd. Click on SUBSCRIBE and then CURRENT SUBSCRIBERS. Enter in promo code: septdiy1 to get the current issue for free; and do it soon because the coupon is only valid until October 18, 2014. Enjoy!Popcosmo in DIY Lifestyle Magazine


Free Binder Covers

DIY, EXTRAS, RANDOM STUFFKim & Chloe21 Comments

Well, I promised that there would be new free binder covers out soon, and I’ve kept the promise by following up with more cute binder covers. I decided to keep it preppy with the color combos + stripes, because I think a lot of you will really like them… I know I love ‘em. We truly think that cute school supplies can make an entire school year more bearable, so we've got you covered when it comes to amping up the cuteness factor of those ugly and plain binders. Click the links below to download a black canvas so that you can enter your own class names in the circle! But. they work for anything -- in fact, my mom is even using them around the house for things like take-out menus  and papers for me and my brother. Hope you like this new design as much as the first set. Free binder covers for the win!

Also, if you use them be sure to post a picture on Twitter or Instagram and tag us @popcosmo and we will totes love you forever and ever. ;)

back to school and office supply binder cover templates
DIY binder covers
DIY binder covers
free downloadable binder insert | takeout menus
DIY binder covers for school and home

DOWNLOAD pink+teal DOWNLOAD blue+greenDOWNLOAD navy+pink

xox Chloe

DIY Graphic Tee

DIY, FASHIONKim & Chloe6 Comments
blah blah blah diy graphic tee | popcosmo

What's one item I could wear with everything? A graphic tee... every time I walk into J.Crew I want another one! But they are breaking the bank, so I turned to my trusty Cricut Explore, which had been getting dusty while we moved and I was away this summer. It's definitely time to start playing with it again since it is so versatile and makes the most complicated craft ridiculously easy! The best part? That's my handwriting. Mhmm. I officially have the coolest shirt around town - my own DIY graphic tee.

tee: Gap | necklace: Ela Design Studio | sunnies: Ray-Ban

Supplies: T-shirt Cricut Iron-on Cricut Iron Ironing board Tea Towel or t-shirt

blah
blah

Feel free to use our .png file below! Then we can be twinsies with the same shirt ;)

Directions: 1. Cut Cricut Iron-On a little larger than the words you are printing and place it shiny side down on mat. Load into the Cricut and follow directions. 2. Be sure to check the box for "Iron On" so that your words will be backward. (This will make sure that when you actually iron on it will be in the right direction) 3. Peel the extra Iron-On material off of the transfer sheet and make sure that no little "extras" are still on your design. 4. Center the design on your shirt and iron onto shirt with a tea towel in between the iron and the Iron-On material. 5. Sit back and admire... then wear what's sure to become your DIY favorite graphic tee and rake in the compliments.

cute graphic tee
cute graphic tee
DIY graphic tees
DIY graphic tees
blahblahshirt
blahblahshirt

Disclosure:  We are members of the Cricut Blogger Network and received product in exchange for review but as usual all opinions are 100% our own. 

Try this T-shirt Tie Dye

DIY, FASHIONKim & Chloe26 Comments

One of our favorite summer projects is tie-dying and as much as we love tie-dye, you know we like to keep it simple... which is why we are such huge fans of Tulip One-Step Tie-Dyes and have been using them for years for all of our projects (see tie-dye shorts and tie-dye beach sheet). We were ready to jump on the Tie Dye Your Summer bandwagon and once again turned to Tulip because they come with bottles that you simply fill with water and you're ready to go. Even gloves come in the box, plus some ideas. All you need is something to tie-dye and a cool idea! t-shirt tie-dye

Striped T-Shirt Tie Dye Prep cool tie-dye patterns 1. lay t-shirt flat and get rid of wrinkles 2. pleat the shirt from top to bottom (you can fold it in the middle if it's easier to handle it) 3. fold sleeves in last, pleating them as well, and tucking them under 4. you should have a flat pleated shirt 5. wrap rubber bands around at intervals, making sure the pleats stay intact 6. your t-shirt should look like a centipede when ready to tie-dye

Dotty T-Shirt Tie Dye Prep Spotted Tie-Dye 1. lay t-shirt flat 2. pinch sections of the t-shirt and wrap the rubber band tightly around. The larger the piece sticking out the top, the larger your circles will be and the more rubber bands you use, the bigger your white space around the circle will be. You could pinch both front and back, but we pinched the front and back together (i.e., the back of the shirt was in the rubber bands you see) and it looked fantastic while saved a bunch of steps.

Once you have your shirt(s) ready, wet them thoroughly. You could definitely do this step first, but we found it was easier to work with dry shirts. tie-dye steps

Gather the tie-dye supplies  - most of which will be in your Tulip One-Step Tie-dye kit + protection for whatever area you will be tie-dying in. We suggest tie-dying in the grass, if you can, since the area will be stained. Tulip tie-dye supplies

Add water to the color bottles you choose and you are ready to tie-dye! It couldn't be more simple, then add color to your shirts directly from the bottle.

tie-dying steps

Once the color has been applied, place them in a bag for 6 or more hours (we left ours in the bag overnight) because we're lazy like that. steps to tie-dye

Remove the shirts from the bags and rinse them in cold water until the water runs clear. It takes a while, but once the color is out, it's gone and your tee is colorfast. Follow the instructions for washing and drying and then enjoy your new shirts. how to make a striped tie-dyehow to make a spotted tie-dye

Voilà, one old tee that was stained turned into a new tee that looks amazingly cool and a new tee that looks much better than plain white! We might cut the neckline on the blue tie-dye t-shirt, but we really love how it turned out.

Follow I Love To Create for some fab & fun creative inspiration on Facebook, Twitter, Pinterest and their Blog. Perfect boredom busters! Get creating!

What are you thinking about tie-dying?

xo ~kim & chloe

 Thank you ILTC and Blueprint Social for sponsoring this post. All opinions are our own, as usual!